How To Securely Export Your Email Inbox as mbox in 2025
Export, Archive, Migrate, or Clean: Do It Securely. No Third-party Permissions!

Every day our email inbox gets a bit more crowded. Between those must-read emails are many we might never open. You've decided it's time to sort them out. Whether you're thinking of moving to a different email place, backing up your emails, or just tidying things up, this guide's for you. Here, you'll learn how to save your emails safely, always protecting your privacy. We'll also show you how the GoodByEmail app can help you clean your email inbox securely.
GoodByEmail
Clean up your email, privacy-first
We will guide you through this process without depending on third-party solutions that inevitably gain access to your data, despite their assurances of security. A wise piece of advice I received from my parents was, “Entrust your data to no one”. This sentiment is the driving force behind the creation of this guide.
This involves exporting your emails using the universally recognized mbox format.
If you happen to be using Gmail, the process is straightforward, and we'll walk you through it. But for those looking beyond Gmail and desiring more universal solutions, we've also got you covered. We'll show you how to do the same with Apple Mail and Thunderbird emails clients.
Should you be looking to export your emails to .pst check out this guide.
Option 1 - Quick & easy email inbox export to mbox with Google Takeout
Works great for Gmail users
We've created a detailed article with the step-by-step mbox export process for Gmail users. It's super easy! In summary, it involve these steps:
- Log in to your Google account.
- Navigate to the Google Takeout page.
- Deselect all services and only choose 'Mail'. This ensures you’re only downloading your emails.
- Click on “All Mail data included” to select specific labels if you don't want everything.
- Choose the mbox format for the export.
- Click 'Next' and choose your preferred download method.
- Google will prepare the export and send you a link to download when it’s ready.
- You can now scan your mbox mailbox in GoodByEmail - a unique tool on the market that helps you easily clean your inbox without requiring access to your passwords, logins, or OAuth tokens.
Now, if Gmail isn’t your primary email provider or if you're interested in universally applicable solutions (which also work with Gmail btw), keep reading.
Don't Miss Out!
Subscribe to GoodByEmail's newsletter. Our updates are filled with tips on how to manage your inbox.
Option 2 - Secure mbox export with Apple Mail
Works great for any type of email account and small inboxes, but you need to be a macOS user
If you're a macOS user and prefer utilizing the Apple Mail client, you can export your mailboxes directly to an mbox file without needing additional software. The process is straightforward and ensures your data remains secure and uncompromised.
Note: Apple Mail can only export inboxes up to 2.15GB. If yours is larger, see the other options in this guide for alternative options.
Steps to Export Mailboxes to mbox using Apple Mail:
- Open the Apple Mail client on your macOS system.
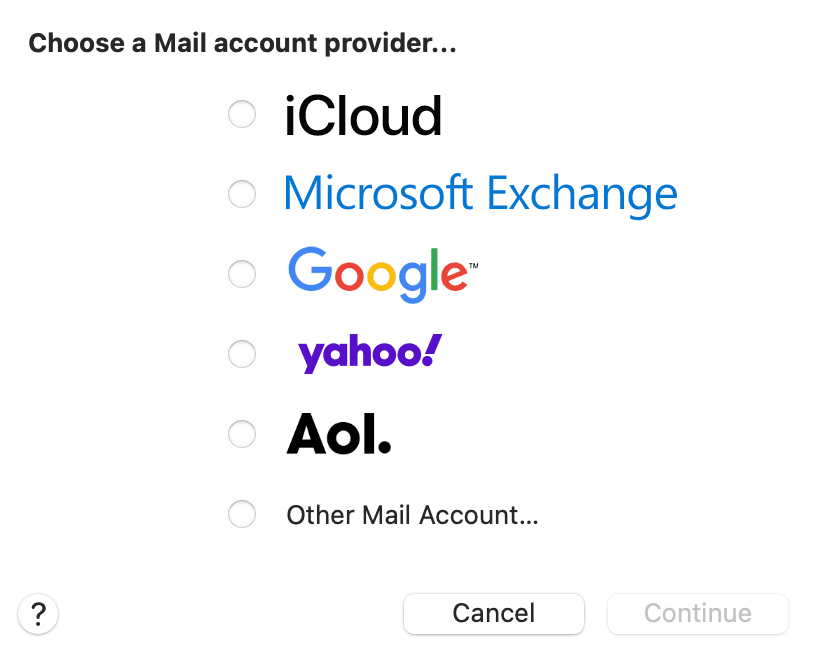
- If you haven't yet connected with your email provider, here's how you add a new account:
- Choose Mail > Add Account.
- Select an account type.
- Enter your account information.
- Wait until it finishes downloading all your emails before continuing to the next step.
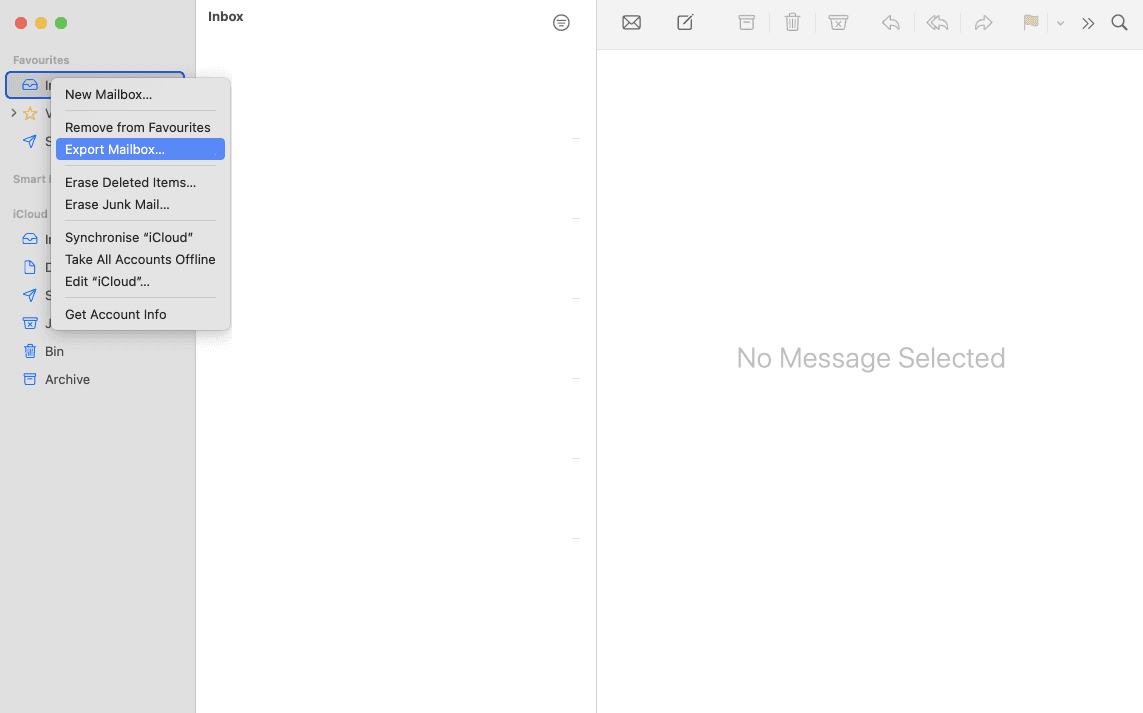
- Select the mailbox you wish to export from the left sidebar.
- Navigate to Mailbox in the menu bar at the top of your screen and choose Export Mailbox....
- Choose a save location for the exported mbox file.
- Click Choose to start the export process.
- Please wait patiently while the system fetches all your files and prepares the mbox file. You'll know it's complete when the folder name changes from, for example, INBOX.partial.mbox to INBOX.mbox. This process might take a while depending on the size of your inbox. Make sure to keep your computer on and active until it's finished.
- Important: "INBOX.mbox" refers to a folder name, not the actual file you need for tools like GoodByEmail. Ensure you use the mbox file located within this folder.
- Once the process is complete, the mbox file will be ready for backup, archiving, cleaning, or migration.
- You can now scan your mbox mailbox in GoodByEmail - a unique tool on the market that helps you easily clean your inbox without requiring access to your passwords, logins, or OAuth tokens.
By following these steps, macOS users can securely export their mailboxes using the Apple Mail client, keeping their email data safe and private.
Option 3 - Secure mbox export with Thunderbird
Works great for any type of email account and available for macOS, Windows and Linux users
Regardless if you're a Windows, Linux or Mac user, Thunderbird offers a clear path to generate mbox files from any email provider securely. Here’s why Thunderbird is favored by many:
- Universal Compatibility: Thunderbird interfaces seamlessly with numerous email providers, ensuring a smooth export process.
- Data Security: With Thunderbird, your emails are processed directly on your machine, mitigating risks associated with third-party tools.
- Open-Source Integrity: Being open-source, Thunderbird's security measures are continually scrutinized and refined by experts worldwide.
For those who enjoy using the ImportExportTools NG Thunderbird addon, good news: GoodByEmail has native support for the .mbox file created by the addon.
Steps to Export Emails via Thunderbird in mbox format
- Setting up Thunderbird:
- If Thunderbird isn’t already installed, download version 115 or newer and install it. Then, go ahead and configure your email account .
- While downloading emails locally may take time based on your inbox size and internet speed, it ensures no data is shared with third parties; monitor the download status at the bottom left corner.
- Thunderbird automatically downloads messages for offline use, ensuring your mbox files contain all required data without removing them from the server. Do ensure your computers is left up and running until the download completes.
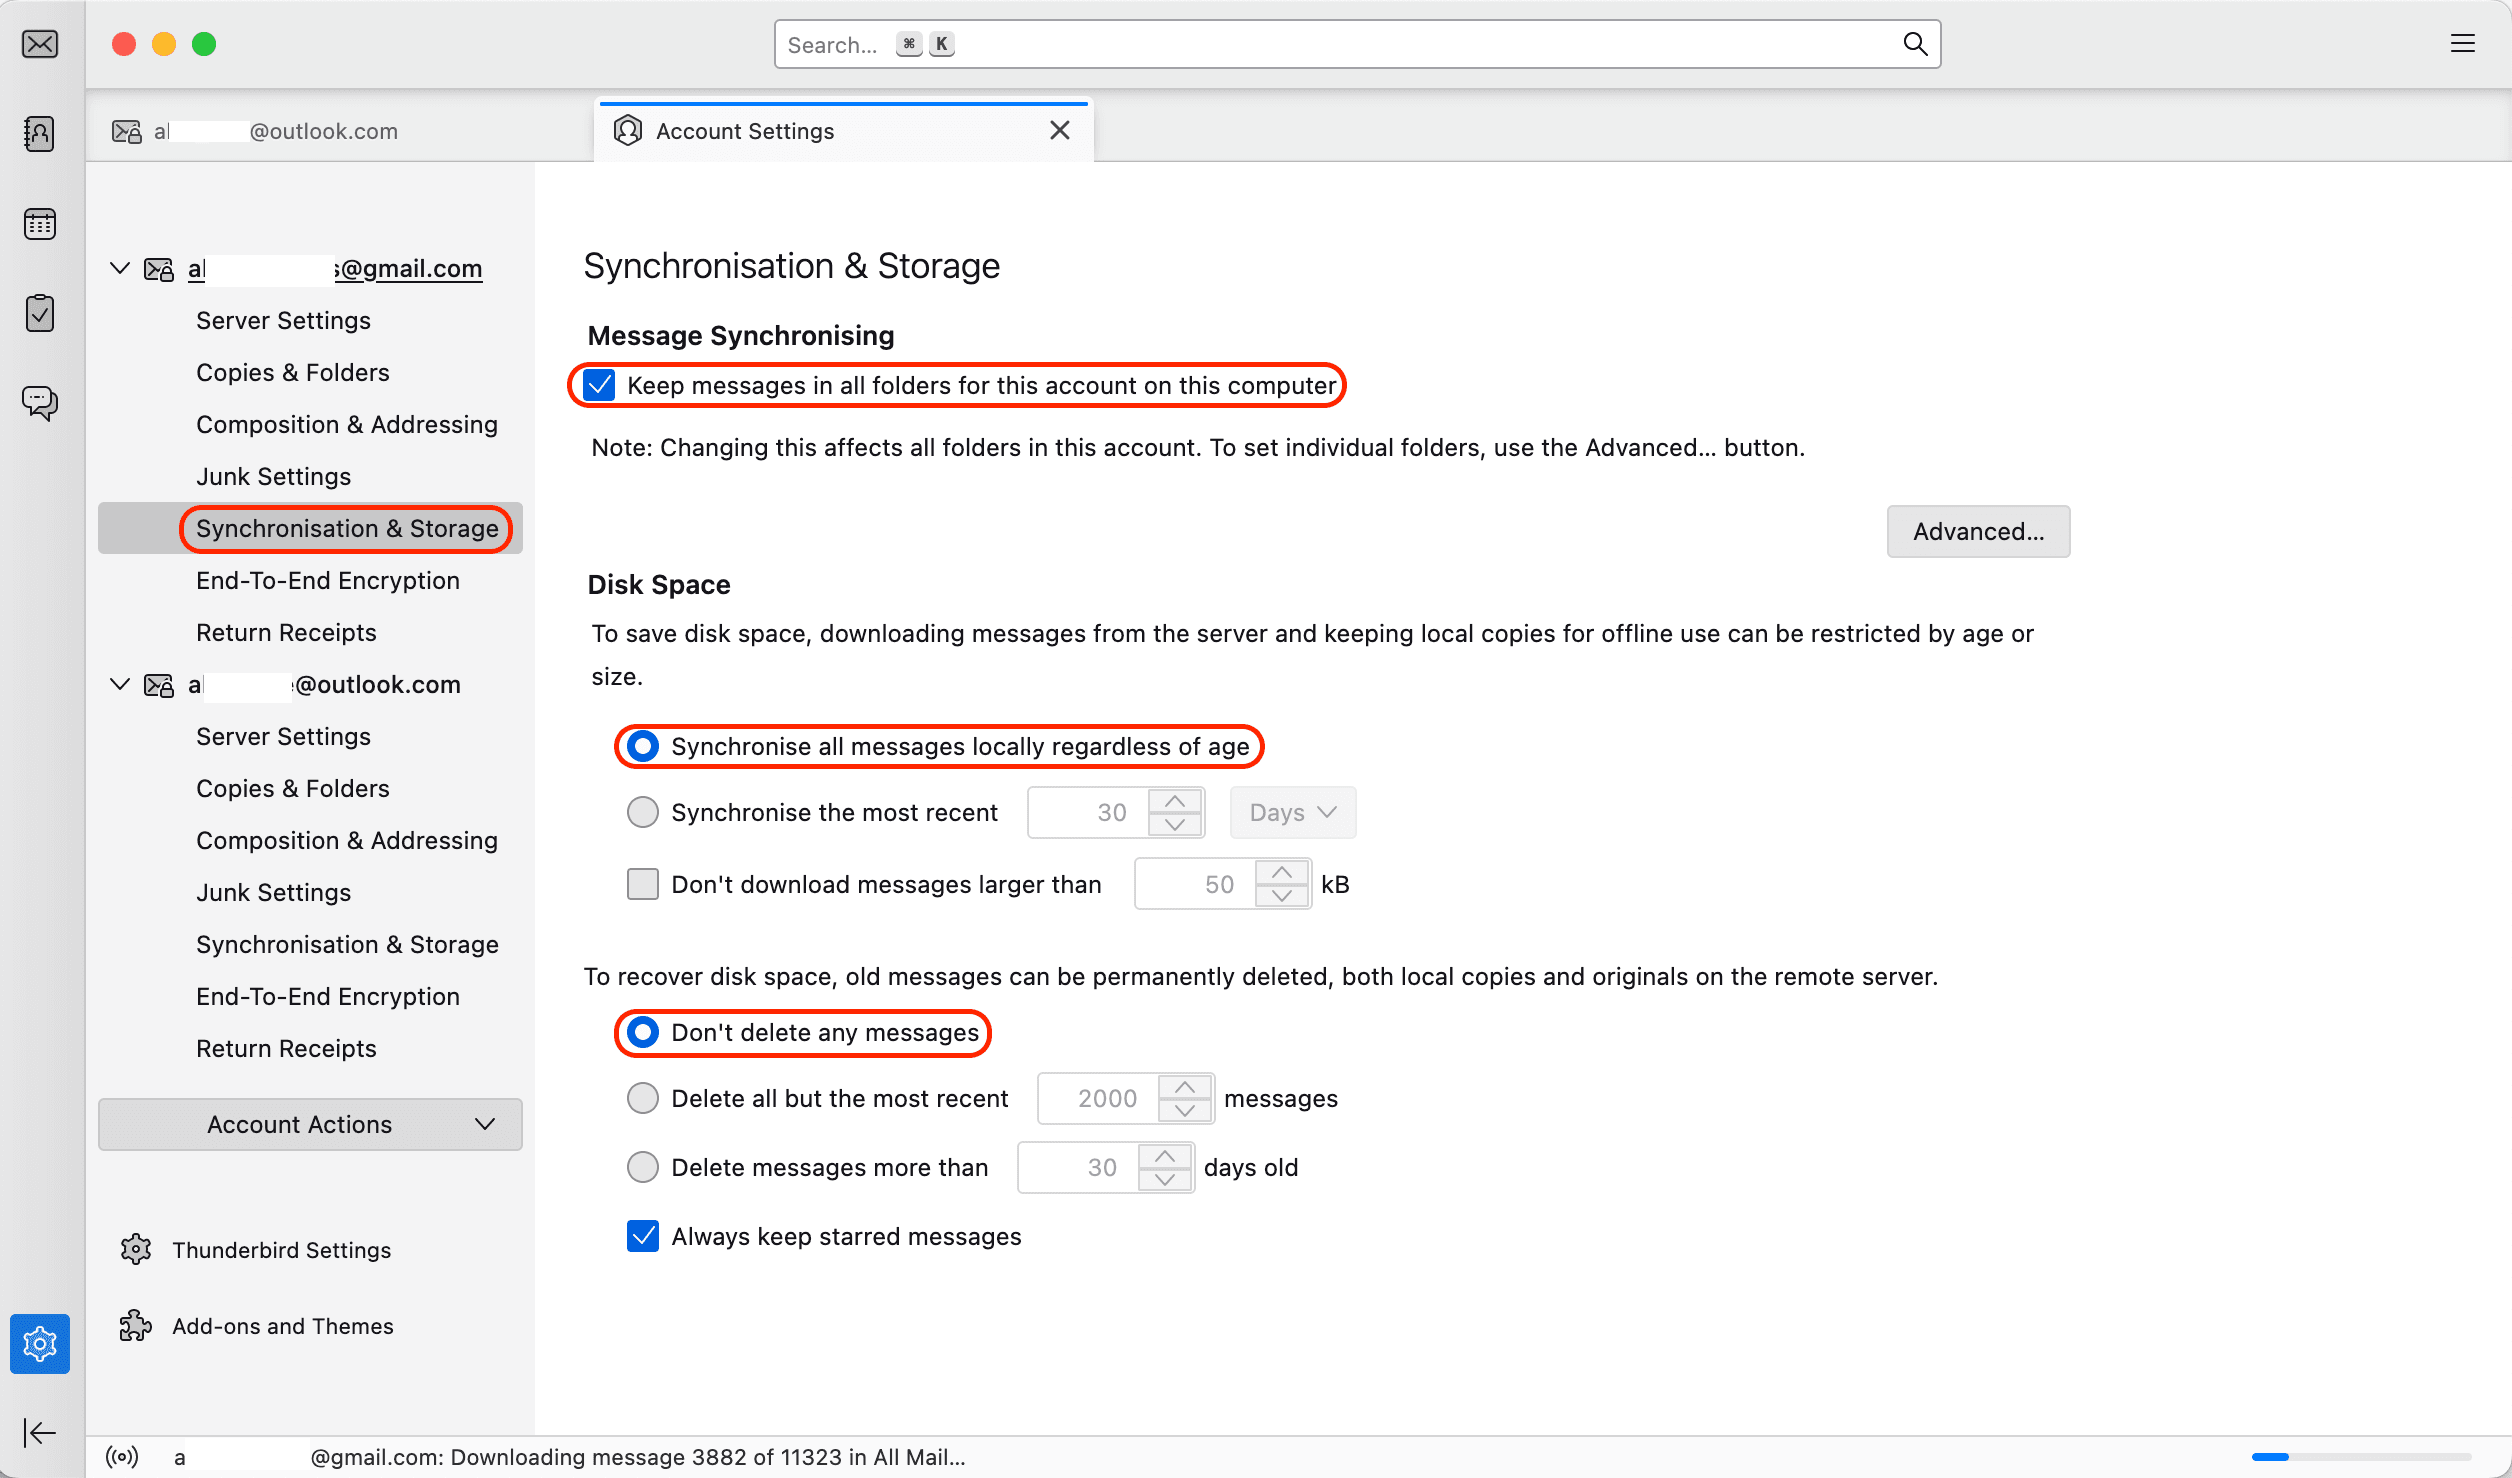
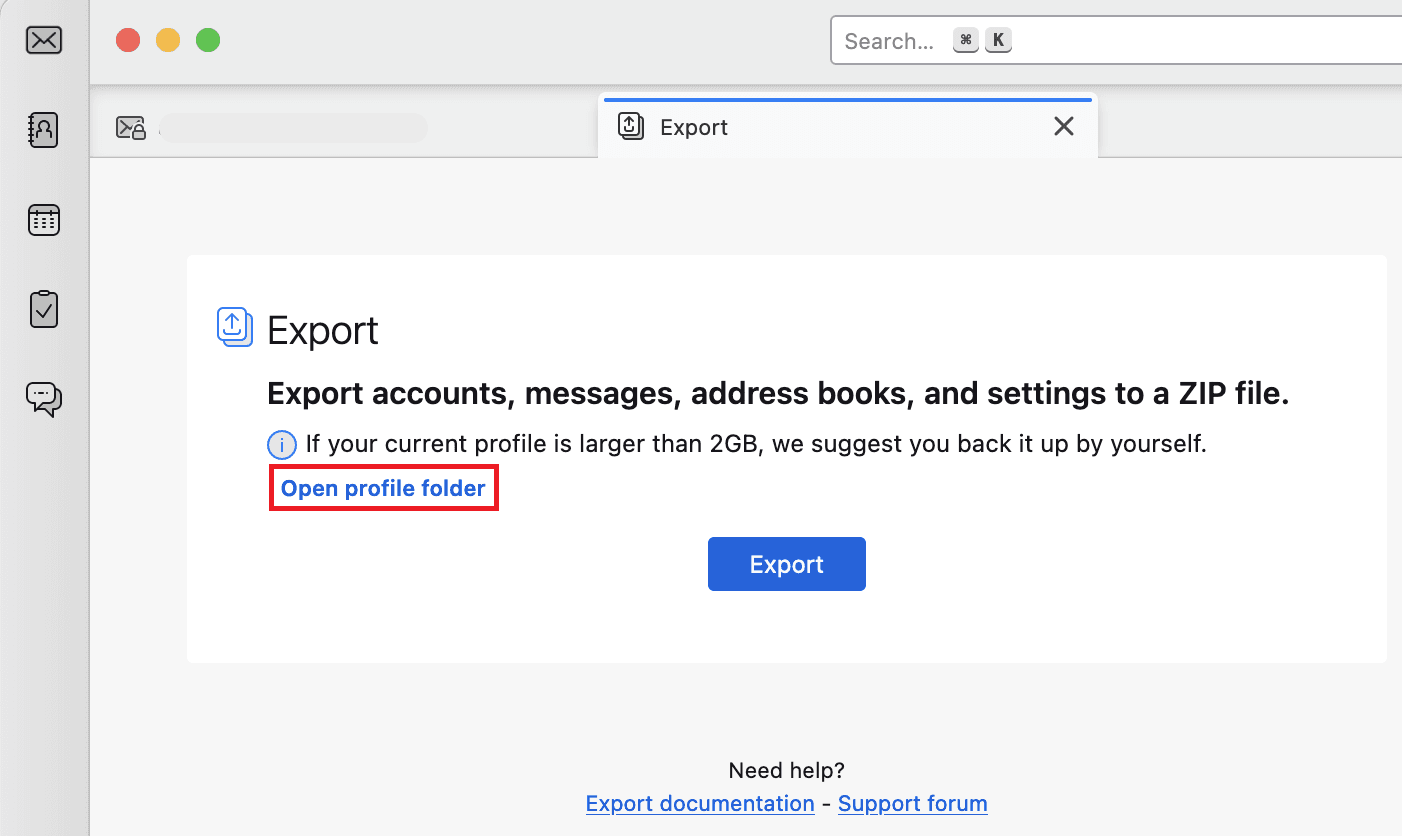
- Note: To ensure Thunderbird retains messages locally and on the server (its default setting), right-click on your email account, select Settings, then Synchronisation & Storage and select the options shown in the screenshot below.
- Accessing the Profile Folder:
- Launch Thunderbird.
- Click on the burger icon (three horizontal lines) in the top right corner.
- Hover over Tools and select Open Profile Folder.
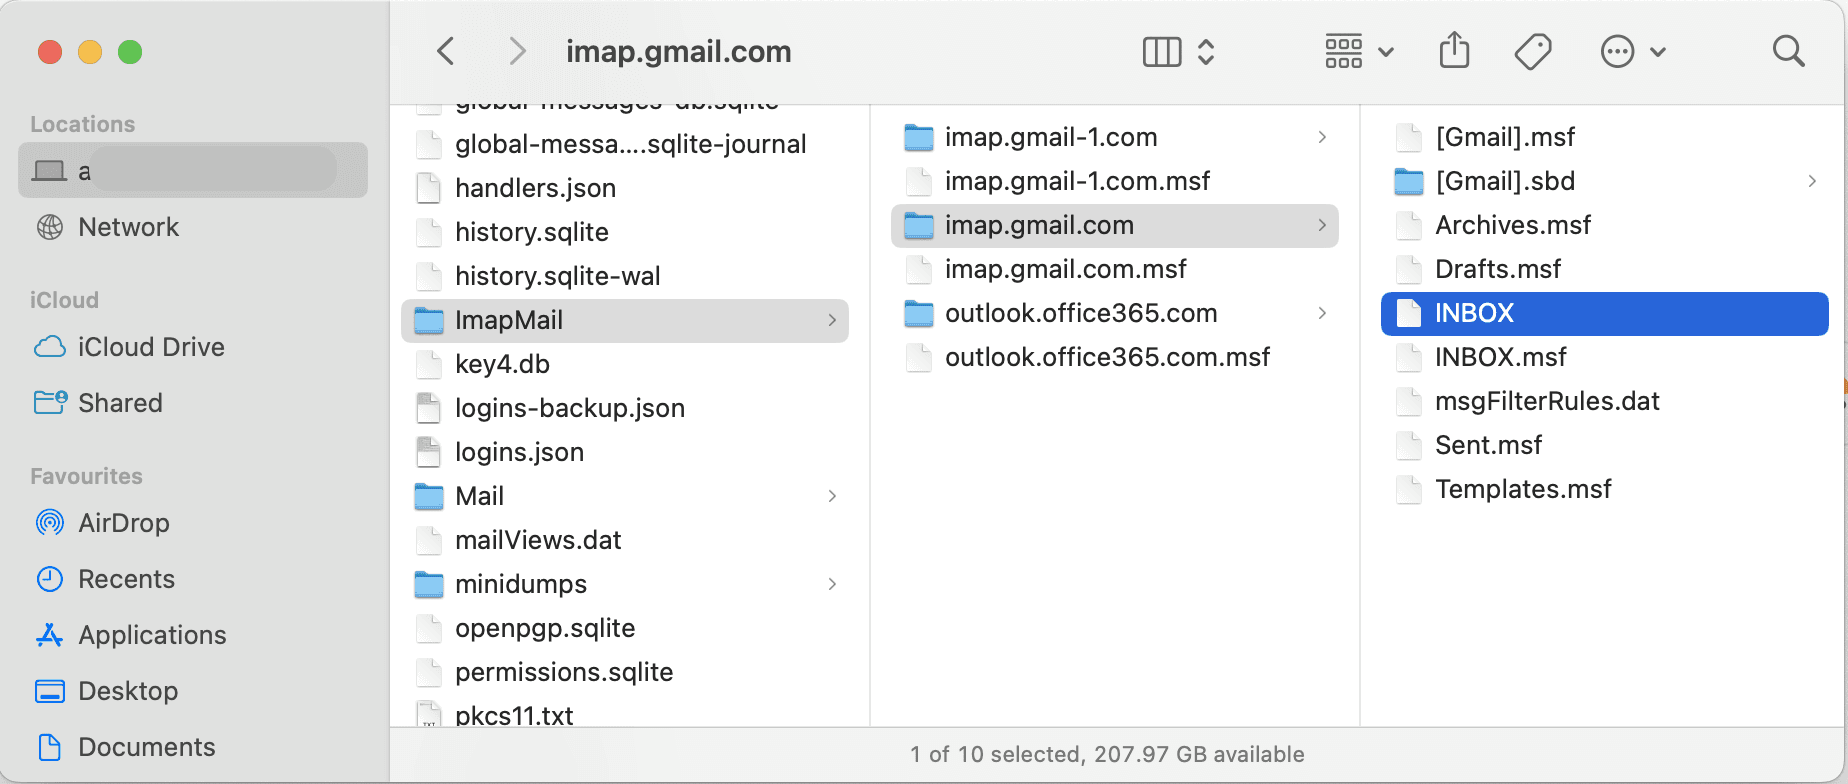
- Locate the mbox Files:
- Within the profile folder, find the ImapMail directory (or Mail for POP accounts).
- Notice how the subfolders are named after your email domain, like imap.gmail.com, or outlook.office365.com.
- Dive into the relevant domain directory to view files corresponding to your email folders. Your mbox files are right there, ready to be used! They are the ones without a file extension and matching your mailbox folder name (e.g. INBOX and Sent) and usually the most interesting ones are very large:
- You can now scan your mbox mailbox in GoodByEmail - a unique tool on the market that helps you easily clean your inbox without requiring access to your passwords, logins, or OAuth tokens.
And that's pretty much it. You have successfully found all your mbox files created by Thunderbird, which can now be used for cleaning, backup and archiving purposes, or perhaps migrated to another email client.
So, no matter if you’re using Gmail or another email provider, and whether you’re a Mac, Windows, or Linux user, you now have the know-how to safely export those emails, back them up securely, and keep your personal info right where it should be—private and safe. Happy mbox exporting!
Clean up your email inbox with way less effort. Check out GoodByEmail and discover why your inbox is out of storage. With GoodByEmail's help you can mass delete emails from unwanted top offenders and unsubscribe from undesired mailing lists with a single click. It's the only truly secure option on the market, your emails never leave your device.
Quick plug: Clean up your email, privacy-first 💪
Isn’t it frustrating to constantly receive that "Your storage is 95% full" message?
Scared of using Email Cleaning, Unsubscribe or Declutter tools that snoop around your emails, even though they swear they are safe?
We got your back! If you haven’t tried GoodByEmail, it’s about time. Not only does it identify which email senders—many of whom you likely don’t care about anymore—are consuming all your storage space, but it also allows you to effortlessly unsubscribe from mailing lists with complete safety!
GoodByEmail uses a unique privacy-first approach by design: It simply cannot connect directly to your email provider. It does not require you to share any logins, credentials, oauth tokens, nor any sort of invasive permissions whatsoever. All the processing happens on your computer and no emails are ever uploaded to GoodByEmail's servers. Plus, you can even use it offline for maximum privacy!
Could you really trust other cleaning solutions available in the market, knowing they have direct access to your emails? Some services monetize by selling your data. Even if they claim it's secure, it raises concerns about the accessibility and potential misuse of your personal information.
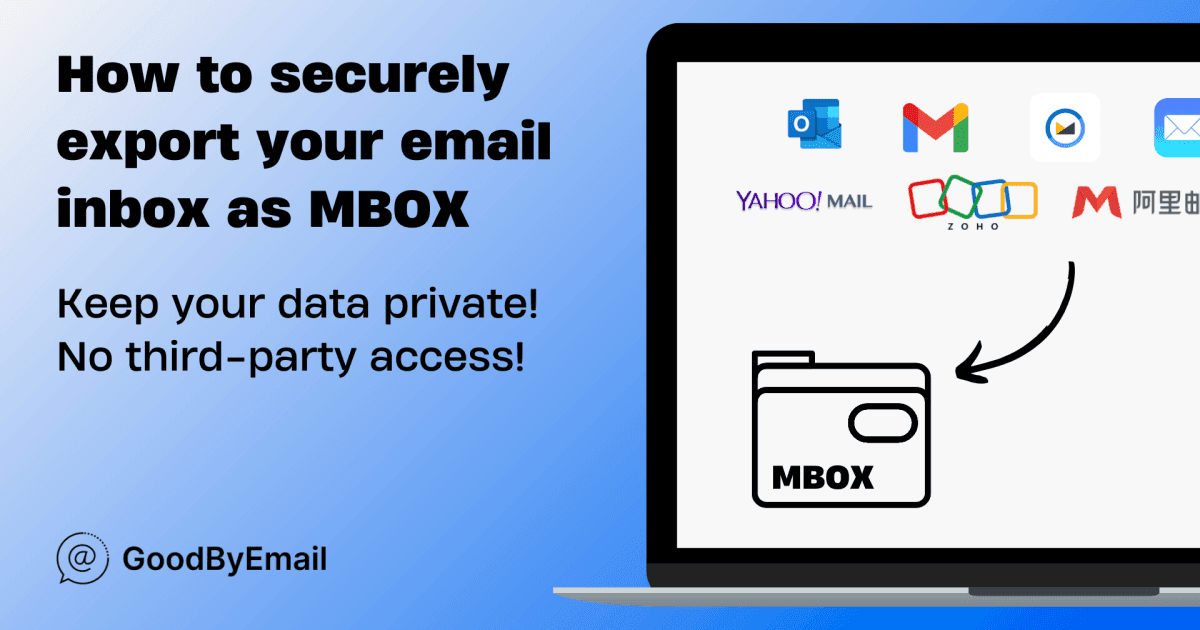
GoodByEmail works with every email provider, you name it: Google, Microsoft, Fastmail, AOL, Yahoo Mail, iCloud, Office 365, Outlook, Zoho, Bluehost Mail, Namecheap Mail, Alibaba Mail, Alimail, Alyun, Gmail, Mail.com, Comcast Xfinity, Live, Hotmail, Yandex Mail, G Suite, MSN, Godaddy Mail, GoogleMail, and so many more.
You only need to make a one-time secure export of your inbox in mbox or .pst format, and GoodByEmail will find out who are the senders eating up your inbox storage space, without anyone else getting a look at your emails. Plus, you can also easily unsubscribe from those pesky subscription emails. It’s easy to do! Need help? This guide has a step-by-step.
So, what did you like about this post? Come say hello on X!
Wondering where to find us?
Follow us on X:

FAQs: Your Burning Questions Answered
- Log in to your Google account.
- Go to the Google Takeout page.
- Deselect all services and select only 'Mail'.
- Click "All Mail data included" to choose specific labels if needed.
- Select the mbox format for export.
- Click 'Next' and choose your download method.
- Google will prepare the export and send you a download link when ready.
- Consider using tools like GoodByEmail: It helps you easily identify email senders that consume most of your Gmail storage. With this information, you can bulk delete emails that significantly impact your storage. Furthermore, GoodByEmail assists in unsubscribing from mailing lists, preventing your storage from filling up rapidly in the future. It operates without requiring access to your Gmail credentials, ensuring the privacy of your data.
- Open Apple Mail on macOS.
- Select the mailbox you want to export.
- Go to Mailbox > Export Mailbox.
- Choose a save location and start the export.
- Consider using tools like GoodByEmail: It helps you easily identify email senders that consume most of your email storage. With this information, you can bulk delete emails that significantly impact your storage. Furthermore, GoodByEmail assists in unsubscribing from mailing lists, preventing your storage from filling up rapidly in the future. It operates without requiring access to your email credentials, ensuring the privacy of your data.
- Install Thunderbird and configure your email account.
- Let Thunderbird download your emails for offline use.
- Open Thunderbird, click the menu icon, go to Tools > Open Profile Folder.
- Find the mbox files in the ImapMail or Mail directory.
- Copy the mbox files for backup, archiving, or migration.
- Consider using tools like GoodByEmail: It helps you easily identify email senders that consume most of your email storage. With this information, you can bulk delete emails that significantly impact your storage. Furthermore, GoodByEmail assists in unsubscribing from mailing lists, preventing your storage from filling up rapidly in the future. It operates without requiring access to your email credentials, ensuring the privacy of your data.
- Not all emails are created equal. Emails with large attachments, such as videos, high-resolution images, or documents, can take up a significant amount of space. However, these types of emails might not be as common in your inbox.
- On the other hand, while individual emails without attachments might seem insignificant in size, having thousands of them can cumulatively occupy a substantial amount of storage.
- Tools like GoodByEmail can be invaluable in this process. It helps you easily identify and delete all emails from the "Top Offenders", i.e. senders that are occupying the most storage. Moreover, it aids in unsubscribing from unwanted mailing lists, preventing future storage issues. The best part? It does all this without requiring access to your sensitive login credentials.
What is mbox format and why should I use it?
What is mbox format and why should I use it?
You can then upload the mbox file to GoodByEmail, a tool that helps you easily identify email senders that consume most of your email storage. With this information, you can bulk delete emails that significantly impact your storage. Furthermore, GoodByEmail assists in unsubscribing from mailing lists, preventing your storage from filling up rapidly in the future. It operates without requiring access to your email credentials, ensuring the privacy of your data.
Why is it important to export my emails?
Why is it important to export my emails?
How do I export my emails from Gmail using Google Takeout?
How do I export my emails from Gmail using Google Takeout?
Can I export emails from Apple Mail? What are the limitations?
Can I export emails from Apple Mail? What are the limitations?
Note: Apple Mail can only export inboxes up to 2.15GB. For larger inboxes, consider other options.